Showing posts with label Design. Show all posts

Friday, May 17, 2013

Summer Bucket List


A goal I made for myself last summer was to try as many new things as possible within the 3 months of freedom from homework and the grind of fitting in school, work and some semblance of a social life. Some first times from last summer included:
  • riding a scooter 
    • The motorized kind one step down from a motorcycle, not the razor kind freshman like to use as their main source of transportation on campus. The best part of this was that it was on the way to watch listen to a concert from a hill with a bunch of other hippies students. Very hipster. 
  • visiting Red Butte Gardens 
    • What a beautiful place. I would recommend it to anyone who is in the SLC area and hasn't been. Especially if you are a U student because you get in for freeeeeee!!! (name that movie)
  • trying sushi for the first time
    •  My friend and I went to a place in downtown Salt Lake where all the sushi is 1/2 off after 11 (happy hour). I had some sort of regular raw fish kind and the vegas roll (sushi that has been deep fried--the Americanized dessert-like kind). Guess which one was my favorite.
  • going fishing 
    • I'm proud to say that on one of our trips I caught the biggest fish of the group-let's hear it for the newbie!
  • gutting a fish 
    • I was surprisingly relatively undisgusted by this chore. I think it's mostly because fish are slimy and gross and I didn't feel bad cutting them in half. Now tell me to do the same thing to a quail or a bunny and I might just pass out. Or start to cry. Or both.
  • filleting a fish 
    • This came right after the gutting and was a lot less gross, but also a lot more difficult. I'm pretty sure most of the pieces I did were just that-in pieces. Like 50 of them.
  • getting my purse stolen
    • Okay, so this wasn't a first I was planning on experiencing, but has now instilled in me moments of terror every time I leave a location. I check about twenty or a hundred times just to make sure I have everything I came with. And yet I still leave things places. I believe every item or importance should come with a clicker like cars do so I can push a button and have them beep at me. Speaking of which I could use this for the before-mentioned car clicker on my keys sometimes. 
As Summer 2013 begins I've decided it's time for a new list of new things to try an accomplish is long past due (I mean, it's already been what, two weeks?)
  • go climbing
    • This was partially accomplished this Tuesday on a crazy free-climbing adventure I went on...more on that later. 
  • skydiving 
    • This was on last summers list and will probably once again not get accomplished, but one can dream, right? 
  • camping
    • This will probably be accomplished next weekend if I get up the gumption to actually join in on the Moab trip...
  • discover downtown
    • It's been a goal ever since I moved to SLC to take a Saturday and just walk around downtown Salt Lake. Go into all the little shops, eat somewhere new, get an awful farmers tan, you know, the works. 
  • go to the farmers market
    • I really should have gone before now...
  • try out the southbound Frontrunner
    • Having a car makes life so much easier, but the price of gas makes me want to curl up in a little ball and never leave the apartment. So I really might as well try this newfangled transportation option and see what all the hype is about.
  • enter a freelace design competition
    • I need to keep up my designing skills somehow this summer and why not have the chance to make boucoo bucks in the process??
  • go to one of the Twilight Concert Series shows
    • I still wish I would have gone and seen Iron and Wine when they came last year, but as usual, something came up. Therefore I would like to try out a new one this year. And yes I will be wearing a thrifted dress, my hair will have some resemblance to dreads and I will probably wear loafers. If you're gonna try and be hipster, you might as well go all the way. Oh, I will also bring a mason jar full of herbal tea to sip on during the show. 
  • go to a fire party and play my guitar
    • I'm still working on overcoming the fear of playing my guitar in front of others. Singing? Nobigdeal. Playing? Terror. But I have this romanticized picture of my playing and laughing and singing with other laughing, singing people all around a fire on a beach during the summer. Since I live in Utah and that is probably not going to change anytime soon, delete the beach part and that is the picture of a perfect summer night in my  head.
Well there are some of my goals for the summer--you guys have any crazy fun adventure suggestions I should add to the list?

C.R.M.
xoxo

p.s. To stick with the random cat theme (What can I say, I can't help it when I search for "bucket" online and get one with a cat. I have to use it.) here is a cat gif to make your day a little brighter :)

http://forgifs.com/gallery/d/126990-2/Kitten_mittens.gif


Friday, January 4, 2013

A Backwards Glance at all the Firsts: 2012

This past year has held a lot of firsts, beginnings, endings, excitement, disappointment, and soul searching. I feel like I have grown more as a person the past year than maybe any year before. On that note, here are a couple of the highlights from 2012 (the year the world was suppose to end. Also, sorry this post is so long, but everything is better with a lot of pictures, right?):

I went to my first crazy college New Years Dance (ok, it was at the SLC Institute so it wasn't THAT crazy).


I went to my first Brain Regan Concert. It was worth every penny and my cheeks were sore all night! If you ever get the chance to go, DO IT!


This wasn't my first, but it was a first none the less! I accompanied my roommates to go see Parachute when they came a second time to Salt Lake City to a sold out show. It was beyond amazing! It was two of my roommates first concert! I am such a concert junkie that it was fun to see them at their first one. 


I planned/went on my first Spring Break vacation without parental supervision. A group of us hopped in cars and went to St. George. It was also my first time driving for longer than an hour at a time (leg=sore). It was by far one of the funnest trips I have ever been on. 

Hugh's Family (Peter was the dad, I was the mom, the rest were our kids :P )


I experienced my first Color Festival. Man was it crazy! But SO much fun. I totally plan on going again this year!


I was bold and had my first "break up" hair cut--everyone says you'll regret it later, but I sure didn't!


I met the guy who plays Elton in Singles Ward. It was a big deal ok?


I posted my first DIY shirt to my blog and Pintrest (it is still my most viewed post and pin).


I started my first full-time summer job that extended into the school year at US Novelty and Party (this was a pic on my first day of work).


I successfully pranked a boys room for the first time with a whole bunch of left over yarn. 


I became a member of the Latter-Day Saint Student Association (LDSSA) at the SLC Institute as head of the Historian committee. I also designed the t-shirts that you can see everyone wearing around the UofU campus!


The first of my best girl friends got her mission call: California ASL speaking. She is in the MTC right now and I am so proud of her!


I went to my first Murder Mystery Party and it was a blast. 


I sang in a choir for the Relief Society Broadcast for the first time (though it was not my first time singing in a choir in the Conference Center).


I went to Nightmare on 13th for the first time (I'm the crazy looking one in hipster glasses almost hidden in the back :p What you can't see is that I'm wearing a cat shirt ;). )


I wore a wig cap and a wig for the first time for a Hallowen Costume. (LOVE this costume.)


Dress: Thrifted (such a good find), Beads: Claires and borrowed from my roommates, Gloves: Halloween City, Boa: Halloween City, Wig: Halloween City, Bracelets: Claires (way old), Ring: Forever 21, Tights: JCP, Lips: Sephora Lipstain

And last but not least, I threw my first ever Christmas Party that ended up being a SMASHING hit! 


So there are some highlights of the "firsts" I experienced this year. To wrap things up, a few firsts and highlights that I don't really have pictures for: 

I experienced for the first time what it feels like to find your perfect match and have them not feel the same.

I got into the Graphic Design program, so I have a concrete plan for the next 2 1/2 years for the first time since I didn't get into the program the first time. 

I was paid for my first design job. 

I created this blog.

I went fishing for the first time and LOVED it. 

I had my first summer romance.

I rode a moped for the first time. 

I ate sushi for the first time and actually liked it. 

I had my purse stolen. 

I spent a summer not at home for the first time. 

I got my first big paycheck and was tempted to blow it all. 

I experienced what it felt like to be loved back...and what it feels like to be the one to end things. 

I started an Etsy shop.

I signed up for my first boutique (more on this to follow).


Well there you have it folks. Here's to 2013 and all the new firsts that are just waiting to happen! I plan on grabbing each new experience by the horns and riding them till the next one comes along!

Happy New Year!

xoxo
CRM


Sunday, June 17, 2012

Newfound and Nifty + Sunday Confessions 6.17.12

First off, I have to pay my dues and give a shout out to the most amazing man in my life. 

My Dad. 


He has done so much for me in the almost 21 years I've been around, I can't even express my gratitude. He is the reason I love sports and especially basketball. He is the reason I can ride a bike and drive a car. He has pushed me to become the best that I can be and he has loved me through every up and down. I don't know what I would do with out his influence in my life and I am so thankful to be able to spend the day with him!

Love you Dad!


Inspiration: 

"Love isn't something that's just tossed around between lost and found."


Charly always makes me cry, and for those of you who know me, I don't cry often. So of course when I had to come home early from church with my little sister who isn't feeling well, it was my Sunday movie of choice. Someday I'll find a man who will love me as much as Sam loved her and would ride with me for hours on a ferris wheel. 


Tunes:

No matter how many times I hear this song, I still turn it up loud and sing along at the top of my lungs when it comes on the radio. There is a reason it is still #1 on iTunes! Also, the music video is horribly funny, just wait until the end!


I also can't help but love all the memes that have surfaced because of this song!


Obsession:

Fonts. 


I am totally a font nerd. 

My Font Book is organized by type and I use it often. 

Helvetica, Comic Sans, and Papyrus are my worst nightmares. 


Projects: 

I honestly don't have any right now. Sad days. But my mind is bursting with ideas like refashioned men's shirts, t-shirt make-overs, a new patchwork purse and a color blocked pencil skirt just to name a few!

Sunday Confessions:


I'm linking up again with Alyx over at Every Day is a New Adventure!

1: Sometimes my cat Maggie is my very best friend. She will cuddle without questions, demand my attention 24/7 and listen without interrupting. If only I could find a man who was just as dedicated. ;)

2: I have a bad habit of buying fabric and patterns...and then never doing anything with them. Boy do I need to get on it before I become a little old lady pushed out of her own room by her fabric collection!

3: I have seen all three High School Musicals more times than I can count and have most of the songs memorized. And to all of those who were discussing it at FHE last week, you know you secretly like some of the songs too and stayed up to watch the first one when it first aired on Disney Channel. Just admit it. :)

4: I really don't like baseball. I went to my first game in years last Monday and ended up talking through the entire game and leaving early to go get non-ridiculously priced food. Call me unAmerican, but I just don't see the draw of a bunch of guys occasionally running around in a circle. On the plus side the peanuts were good!

5: I'm really wantin' me some summer lovin'. If only so I could sing the song from Grease with my roomies!


Well there you have it folks. That's all for me today! Here's hoping the next week will be a little less hectic and some real blogging and project doing can get done. Until next time!


xoxo
C.R.M.

Wednesday, May 30, 2012

The One-Yard Shirt

I have been trying to get this tutorial up for over a week now but just haven't made the time to actually sit down and type it out. But here it finally is and I hope you like it!

The One-Yard Shirt

You know when you find some crazy awesome fabric while browsing through the aisles at Joanns but it's just a little too bright or garish for a dress or a skirt? Or when you have a random yard leftover from a pervious project and you just don't know what to do with it? Well have no fear! I have the solution and it's as easy as pie. {Though I'm not sure making a pie is actually that easy. Sounds pretty hard to me. Maybe I should rephrase that to say "as easy as eating pie"...}


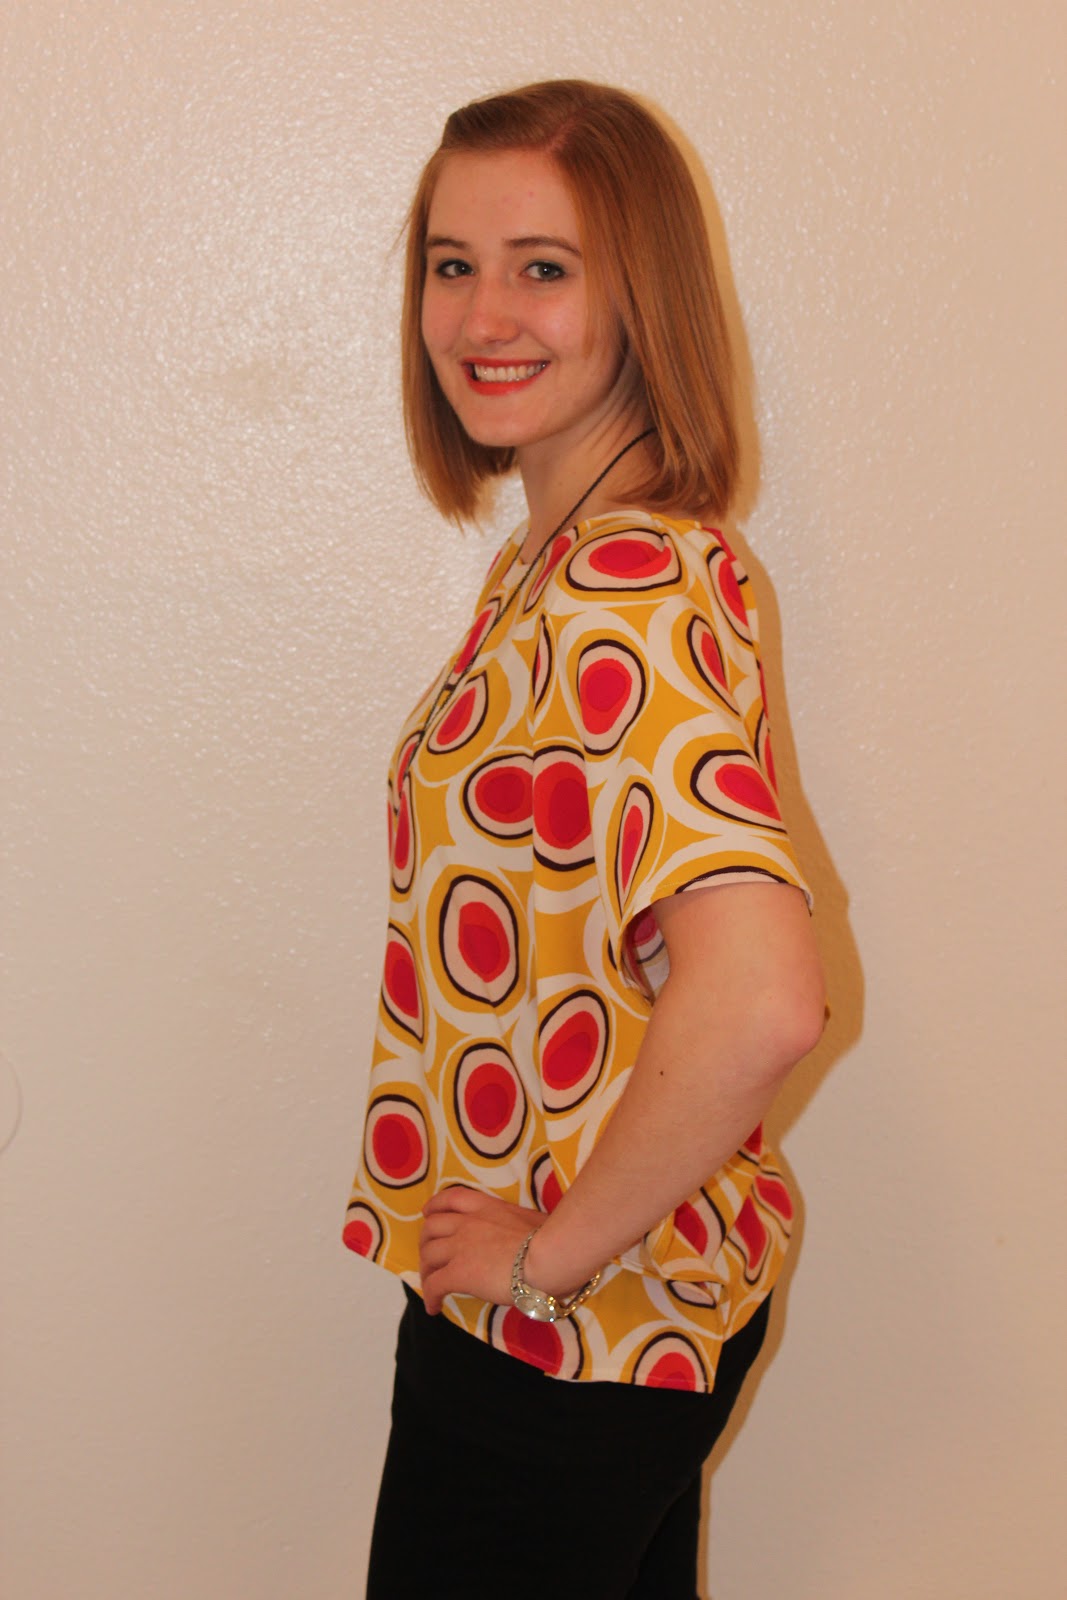
{Thanks to Heather my roomie for taking pics of me! Check out her blog here.}
{Outfit: Shirt: hand-made, Necklace: Claires (bought forever and a day ago), Pants: Old Navy, Watch: Anne Klien.}

Step One: Choose a piece of fabric that is about a yard long. It could be a bit less or a bit more depending on what size you are and how flowy you want the sleeves to be. Make sure you wash your fabric before you start sewing with it to ensure there won't be any shrinking, stretching or pulling once you sew it. 

{I fell in love with this fabric as soon as I glimpsed it. I thought this was the perfect project for it's bold pattern and colors.}

Step Two: Before you start cutting or pinning, I found the easiest thing to do first {after ironing of course} is to hem all the raw edges. Lay out your fabric matching selvages and edges to make sure everything is even and cut away any excess. Then plug in your sewing machine and hem away! {I did a small rolled hem, but you could do any type you like.}

*Note: If you are using a stretch knit fabric you don't need to do a hem because it won't fray in the wash! Lucky you!


Step Three: Find a T-shirt that you like the fit of and lay it out on top of your fabric. {The neck of the shirt should be on the side of the fold and the bottom should be along the open end.} You will use this as a base for where to sew up the sides and how wide you want the neckline to be. 


Step Four: Mark about an inch or so away from the edge of the T-shirt with pins. {Make sure the botom and sides of your fabric are even.} Mark from the bottom of the shirt to the bottom of the armpit. This will be your stitching line. You can eyeball the distance from each side or you can measure it out with a tape measure if you want to be more precise. I used a tape measure just so that one flowy sleeve wouldn't be bigger than the other. 

Step Five: Mark the middle of the top folded edge of the fabric with a pin and do the same with the neckline of your T-shirt. {I used a different shirt for the body and the neckline because I wanted a round neckline, not a v-neck.}


Step Six: Cut through both layers of fabric to create the back neckline of your shirt. If you want to have more of a boat neck, you could cut the front and back necklines the same, just making them wider and lower. This step really just depends on how you want your shirt to fit. I cut the back to one level and the front to another.


Step Seven: It is hard to cut the front using any sort of templete because you don't want to cut through the back of the shirt. So I just moved my templete shirt and eye balled the front neckline, trying to make it even on both sides. 


Step Eight: Before you sew the sides up along your pins, it might be a good idea to try on your shirt. But be careful not to get impaled with pins or rip your fabric in the process! This will help you know if you made your stitching lines far enough apart so it fits your torso how you like it. This will also help you see how well the neckline you cut out is going to fit and if you need to make any adjustments. Speaking from experience it is better to make your neckline smaller than you think you need it-account for a rolled hem and the nature of your fabric {stiff, flowy, stretchy}. 

Step Nine: Once you are happy with the fit of your shirt, sew up the sides with wrong sides together along your pins {backstitching at the beginning and the end} and hem the neckline. I found that to avoid puckering or bulk in the hem of the neckline, it was better to pin it before sewing. 


{I tried to make the stitching line a little more visible on photoshop since I was using white thread and it wan't visible at all.}

Step Ten: Once I was finished stitching up the sides and the neck of my shirt I realized the neckline was a little bit wider than I was comfortable with. So I decided to put in a pleat on each of the shoulders and it ended up looking really good! I took it in from the middle of each shoulder about an inch.


Well that's all I have for you folks! This is a really fast and fun shirt that could be end up becoming a new staple in my wardrobe in lots of different patterns. My roomies already have me lined up to make some for them too! :)
Happy Sewing!


xoxo
C.R.M.


Tuesday, May 15, 2012

Ruffled Shirt Tutorial


I began making this shirt by using this tutorial...but I ended up taking quite a few deviations. 

My first attempt at finishing off this shirt did not end well. I did the ruffles in a bib shape only on the top...well, it definitely looked like a bib. And a fluffy one at that!

{Sorry I don't have pictures of all the steps, I only decided to make this into a tutorial when the finished product didn't look too wretched!}

Step One: In order to make this shirt, I bought the 3/4 length black shirt to use as the base and a tank top with lace on the bottom and top to cut up and make the ruffles with. {I bought both of these shirts for less than three dollars. If you live in the Salt Lake area, check out the Downeast Outlet Store by Walmart off 1300. Everything in the store is under $10 and you can get super cheap shirts to chop up! It was a bad day for my bank account when I discovered that store!}

Step Two: Cut up the shirt of your choice into strips. I cut mine into 1-2 1/2 inch strips. It just depends on how thick you want your ruffles to be. I snipped the edge of the shirt and ripped rather than taking the time to cut each strip out precisely. 

Step Three: Using a long basting stitch, sew the top edge {long ways} on your fabric strips. Leave the thread ends loose and pull them to gather the strips into ruffles. 

Step Four: Place your ruffles in the design that looks good to you and pin down the top layer. You could work from the bottom up so you don't have to pin back each layer as you go, but I worked from the top to the bottom because I'd rather run out of fabric strips at the bottom rather than the top!


Step Five: Start sewing each layer in place with a stretch stitch {if you are working with knits} by following your basting stitches. Pin back each previous layer as you go so you don't catch it in the next one. Continue in this fashion until you have reached your desired number of layers/ruffles down the center front of the base shirt. 


Step Six: To finish off the top, I did a ruffled flower. I accomplished this by spiraling the ruffled strips until it was full enough. I started on the outside and worked my way in. 

And...Voila! A brand new shirt with some pazazz! 

{Disregard my gross hair and tired eyes in these pictures!}


Some ideas for the next time I do this project:

1: Make the ruffles a little smaller and closer together so the bib idea could actually work. It also wouldn't have looked as fluffy if the ruffles had been out of the same color as the base shirt.

2: Cut the shirt down the middle and make it into a cardigan! My roommate Katie gave me this idea and I think it would look super cute. It would make the ruffles less bold and be more versatile in mixing and matching in different outfits. 

Good luck with your ruffling and let me know what you think!

xoxo
C.R.M.

Monday, May 14, 2012

Refashion: Skinny Jeans

I have been trying to figure out what to blog about next and I have had lots of ideas, but no time to actually make them fruitful. But now with school being out and no job in sight, I have a lot of empty time on my hands. Instead of continuing to waste it away, I have decided to try my hand at some tutorials of the projects I have been doing lately. I've never tried this before, so let me know if anything is unclear or you have any questions. Well, here it goes!...

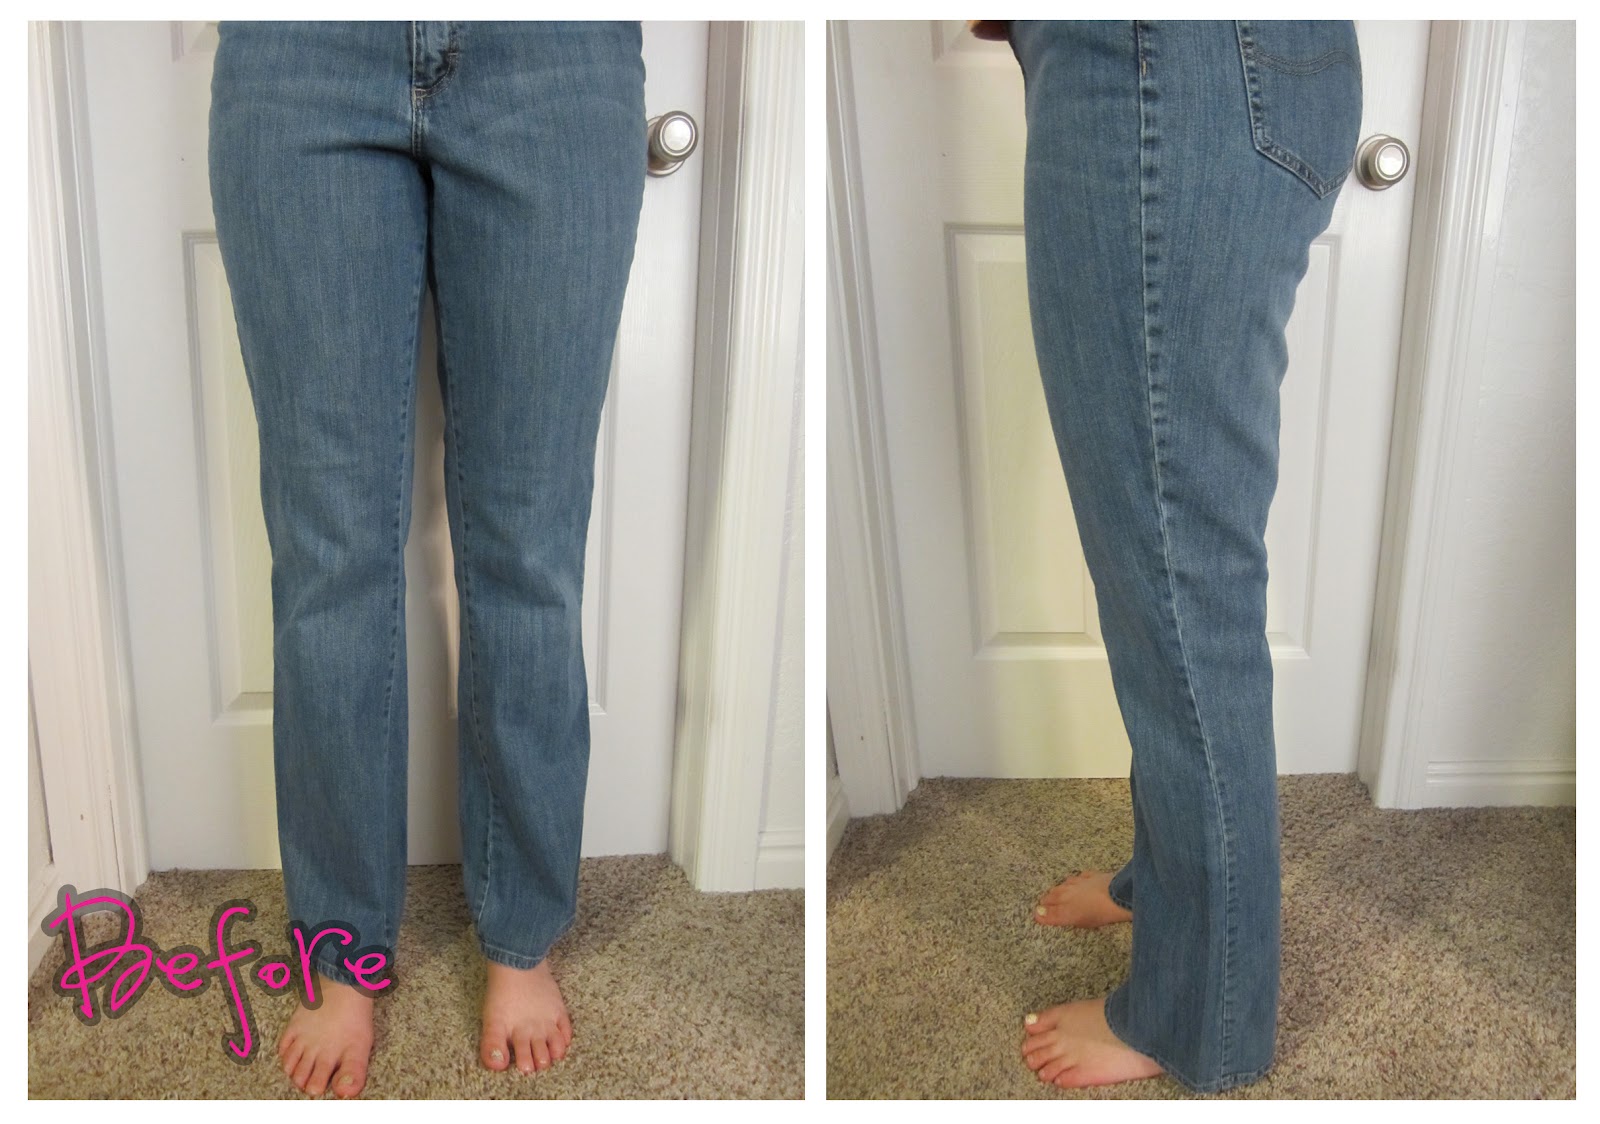
My little sister has always had the problem of finding skinny jeans that fit her. She is a very tall girl, so they are usually too short. So why not take old flare jeans and fix them up? 


{I ended up doing a couple of pairs of jeans for my sister, so the pictures are from multiple fixes--hence the different shades of jean.}


Step One: Put on your jeans inside out and pinch the sides to your leg to how skinny you want them. Only do this to one leg of your jeans for now. Just make sure it feels comfortable! 

One thing you might want to consider is whether or not your jeans have a decorative or thicker seam on the outside or inside edge. If this is so, only take in the side that does not have the decorative edge. If you take in the decorative edge side, you will be able to see where your stitching ends and the original seam starts and you won't have as clean of a finish. 

{*Note: The pinning is a whole lot easier to do with someone else's help! I have also seen this part done by laying a pair of skinny jeans on top of the ones you want to fix and pinning along the edges, but I found this method to be unreliable and harder to get a perfect fit.}

Once one leg is pinned, carefully take off your jeans, no one likes to get poked!


Step Two: Before you start sewing your jeans, make sure to get a jean or heavy duty needle for your sewing machine. A regular needle might still work, but it will be harder to sew through the thicker parts of the fabric and you might get your machine jammed or break a needle. 

Once you have your new needle, starts sewing the sides of your jeans where you pinned them. Make sure you pull the fabric tight against the original seam and that the fabric lays flat. 


Your finished stitching should look something like the above pictures depending on how tapered you want the leg to be. Turn your pants inside out and try them on to make sure you like the fit of the pant leg. If you need to make any adjustments, do so now because your first leg will become the templete for the other leg. 


Step Three: Once you have one leg sewed up to your liking, line it up with the other pant leg with the outside seam. Make sure it lies flat and that the bottom of the pant leg matches up. 

{*Note: This works best if you work one side of the pant leg at a time because there will be some bulk in the middle that will not lie flat if you line up both sides at the same time.}


Step Four: Once you have the pant legs lined up, pull back the stitched side to reveal the unaltered side and pin it to match up with the other leg. Do this up and down each side of the pant leg. Now you are ready to stitch up the other pant leg like you did the first. 

Once both legs are stitched up, try on your pants right side out and determine if both legs feel the same in tightness. If not, fix any problem areas and try them on again. 


Step Five: When you are satisfied with the fit of both pant legs, finish off your seams with a zig zag stitch and cut off the excess fabric or serge the edge to keep the fabric from fraying too much in the wash. 


Step Six: Enjoy your new pair of custom fitted skinny jeans! This tested method has worked wonders for three pairs of my sisters pants and one pair of thrifted colored jeans I found at Savers that needed some love as well. {Sorry I don't have a before picture. I'll be better next time!}


Well, I hope this tutorial was helpful and that you have lots of success in your skinny jean making endeavors! Hopefully this will be the first of many tutorials and DIY projects from the meanderings of my bored to death mind! :)

xoxo
C.R.M.