Showing posts with label Tutorial. Show all posts

Sunday, July 7, 2013

Headwraps and Hotties

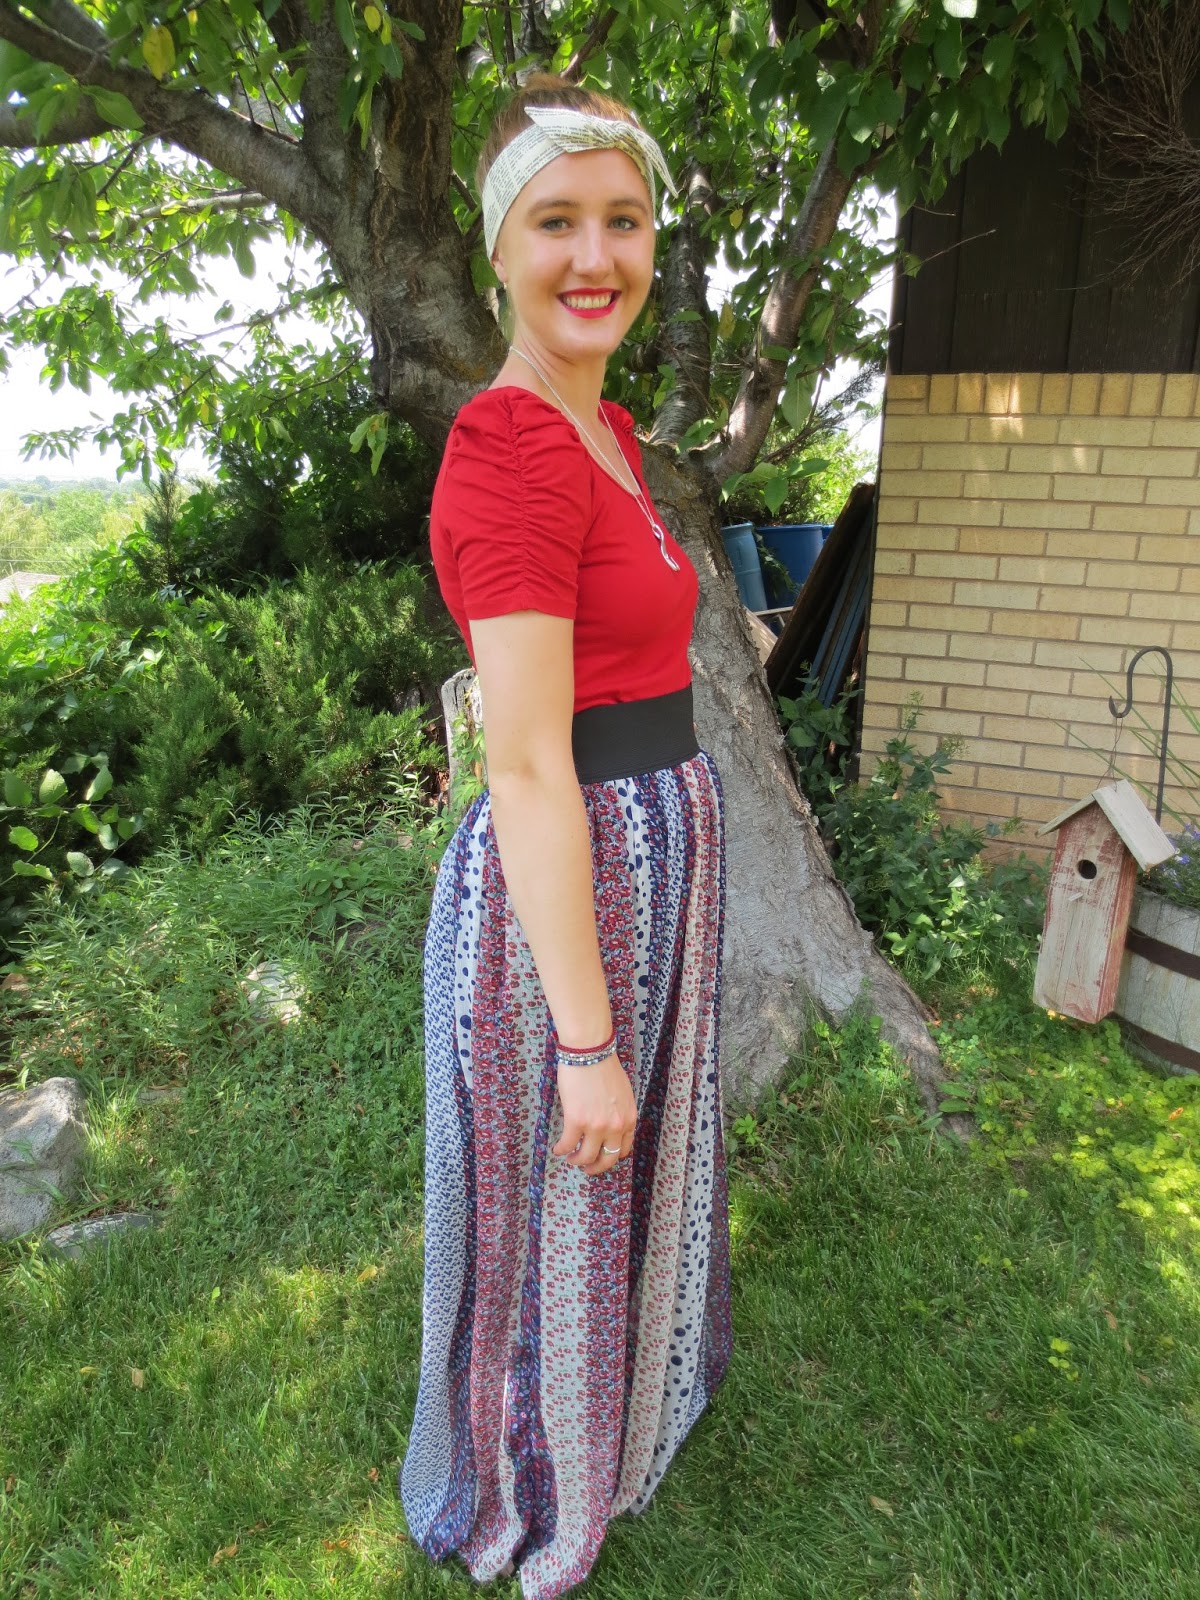
Okay, so we aren'te super models, but I think we're pretty cute :) Especially in these new headwraps that are now available in the shop!


Oh yeah. Super Sexy. We are really good at fashion posts. 


Mustard headwrap in the shop! 


Outfit Details: headwrap: c/o Stylish Stitchings, shirt: DownEast Basics, skirt: DownEast Basics, flip flops: Payless


Necklace: c/o Dragonfly Boutique


Bracelets: DIY (tutorial here), Ring: booth at Freedom Festival 


Outfit Details: headwrap: c/o Stylish Stitchings, shirt: Forever 21, skirt: handmade


Bracelets: DIY (tutorial here), ring: booth at SLC Arts Festival


Necklace: booth at Freedom Festival (it's pretty much my new favorite thing)


And sometimes model poses fail...but it's all good :) 

xoxo
C.R.M.

Friday, July 5, 2013

'Merica Day and D.I.Y. Beaded Bracelet Tutorial


I came home to good ol Springville, Utah for a long Fourth of July weekend to spend time eating way too much food, petting my cat, playing with my family, and running into an ex-boyfriend, his wife and baby at the freedom festival. Yeah...did I say hello? No. Avoided like the plague. But I must admit that I really love the Fourth of July! Something about fireworks, red, white, and blue, and parades gets me all excited!


Sisters, sisters, never knew such devoted sisters! 


Apparently I was the only one that got the "model pose" memo


My favorite buy of the weekend. A fork made into an elephant necklace. Thank you Provo Freedom Festival.


My other favorite accessory of the day--Stylish Stitchings 4th of July bow of course! 


As we were recovering from a couple hours sitting in the sun at the parade in Provo (we had a spot saved under a tree until someone moved our blankets in the middle of the night--apparently people are pretty cut throat about their parade spots!), my little sister and I got busy making some cute bracelets she had learned how to make at a Young Women's activity through our church.These cute and easy bracelets fit the whole "stacking bracelet" trend that's been going around and let me warn you now: making them is addicting!! So I decided that it's time for another tutorial!


Step One: 

Gather all the supplies you will need. Of course I forgot something in the picture: tape. But it really doesn't require very many supplies. We ended up having everything on hand already. You can replace the hemp string to anything from leather thread, to twin, depending on the look you want. You do need something that is thin enough to tie. 


Step Two: 

Cut a length of hemp that is twice as long as your wrist plus some. You will need enough to make a loop at the top and tie the button on at the other end. I always give myself a lot more than I think I will need just in case. I hate it when I get to the end and don't have enough room to finish it off!

Step Three: 

Fold your length of hemp in half and tie a knot at the folded end to make a loop. The loop should be large enough to fit your butt on of choice through it, but not so big the button will just fall out. 


Step Four: 

Tape the loop of your string down to the table and leave enough table space for the length of your bracelet to sit on the table (you will need to hold down the strings, so you can't tape it down to the end of the table like a normal friendship bracelet). For some reason I couldn't get my picture to rotate, sorry folks, but you get the idea. You will also want to tape the opposite end down so the strings are tight against the table with about a 1/4" in-between the two strings. 


Step Five: 

Thread your needle and tie it off at the end of the string. Make the doubled over string as long as you can without it running the risk of getting tangled as you sew the beads on. Once you have your thread ready, tie the knotted end onto the lefthand hemp string. I tied a triple or so knot just to insure it was tight up to the top of the string by the knot that makes the loop. You can leave the knotted end hanging until you are done with the bracelet or you can trim the loose end right away. 


Step Six: 

Okay, so I realized I skipped a couple of easy steps while i was taking pictures, so hopefully this will make sense. If not, please let me know! Next you want to string a bead onto the string you just tied to the hemp. After you have strung the bead on, using the needle, go under the second piece of hemp and pull the bead tight like in the picture below. Then go through the bead again. This is making a loop around the second hemp string and holding the bead in place from both sides. 


Step Seven:

Now that you have gone through the bead again with the needle, go back under the 1st hemp string and pull the thread tight, fitting the bead snugly in-between the two hemp strings. Once the bead is secured and in the position you want it to be in, string another bead onto the thread and repeat the steps. 


Step Eight:

Keep adding beads until you get to the desired length of bracelet, anklet or wrap around bracelet (just make the hemp thread lengths twice as long so you can double it over). 


Step Nine: 

Once you have all the desired beads on the hemp, it is time to secure the button. Take the tape off of the table, cut off the needle, and pull the three strings together at the end (the two hemp strings and the sewing string) to make a knot as close to the bottom bead as possible. 


Below is what the knot should look like with all three strings included. 


Step Ten: 

Once the knot is in place, you can tie on your button and trim the sewing string off near the knot (I tied my sewing string a couple of times around the base of the knot just in case, but you don't have to). Put one hemp string thorough one set of holes and the other string through the other holes, pulling the button tight. If you have a two hole button, then string both of the hemp strings through both holes. 


Step Eleven: 

Turn the button over the tie the two hemp strings together to secure the bracelet. If you have a two hole button, tie the two hemp strings around the knot by the base of the bracelet. 


Now you have a completed beaded friendship bracelet and you are ready to make ten more for yourself, family and friends! :) I got good enough at making them that my little sister who taught me how wanted me to make some for her rather than do them herself! Ha!


Here is what the double strand bracelet looks like (I think this one might be my favorite). 


I hope you enjoyed this tutorial and that you have found a new favorite pass time while watching movies on lazy summer nights! Please comment if anything is unclear :) Hope everyone had a fantastic 4th of July!

xoxo
C.R.M.


Thursday, December 20, 2012

Christmas Extravaganza!

Well it's been almost a week since my party last Friday and I am finally getting around to posting the results. I must admit I was amazed at the outcome. The changed location ended up being perfect, I had amazing helpers to set up and take down, the food was all eaten, and I think everyone had a great time. It just goes to show that even when everything looks like it's going to crash and burn, it really can work out in the end. 

Ok, on the fun part! The pictures :)


Here was my outfit for the night. I was hoping to make something new for the party, but time ran away from me and I had to scrounge through my closet to find something that I hadn't worn for awhile

Dress: Down East Basics (old), Belt: Wow, I can't even remember!, Shoes: Forever Young Shoes (old, like 8th grade old), Tights: JCP, Necklace: Gift from China, Lips: Sephora Lipstain

I was happy it turned out as well as it did for a very last minute holiday ensemble! 


The dessert table: definitely the favorite spot to mingle all night. 


The cute banner I made to add a little sparkle. A party just isn't the same without a banner! :)


The cute tree decoration I made using this tutorial. 


Hot Chocolate Station (Note to self: A small thing of Steven's would have been PLENTY.)


I think I ate more of these throughout the night then I did cookies!


I love these bowl pedestals! So much classier than just sitting the bowl on the table. 

Quick D.I.Y. tip: 

1: Buy a cute bowl or platter

2: Buy a glass candle stick (often on sale at Hobby Lobby)

3: Wash bowl/platter

4: Hot glue or super glue (I like to use the glue brand "Goop") the candle stick to the bowl/platter and "Ta Da!" you have an amazing platter your friends will want to take home with them it's so cute!


I had a bunch of leftover felt from making the first cute tree (they just took too long to make a ton of them), so my mom and I made up this cute decoration that was a TON faster. A step by step tutorial on this one will be coming soon!


We tried to dress up the walls as well as we could with some beads and twinkle lights. 


I stole the ever popular photo booth idea and it was a hit!


What can I say? I love a good fake mustache and top hat! (Also, props to Camilla who is pictured above for doing my hair for the night! She is amazing!)


In the end the party was a great success and even though it caused me much stress and loss of sleep, I'm glad I was able to pull it off and might even consider doing it again next year...maybe...


Or maybe it would just make me look like this again ;)


xoxo
C.R.M.

Friday, December 14, 2012

Panic

So I'm throwing a Christmas party tonight. The panic of pre-party-planning jitters have arrived and I'm not sure if I will live to see tomorrow. Or the end of tonight. 

Just kidding. 

But I'm pretty sure this is how I look right now: 


(Or at least that's how I feel like I look.)

I know I'm being overly over dramatic over this party (how many times can I say 'over' in one sentence ), but I want it to be a success and I don't want all of my hard work and money to go to waste. I'm sure you've all felt that way about an event at one point or another. You've tried to keep your expectations low, but in the end you just hope and wish it will be a smashing success.

Well I don't know which way it will turn out to be, but there will be pictures to follow and even a tutorial on how to make some cute centerpieces that are now not even being used as centerpieces because my venue got changed. (See, I have a little bit of room to panic, right? Right?)


xoxo
C.R.M.

Saturday, July 7, 2012

Summertime Flip Flops

I'm sure we have all made a pair of flip flops like this at least once in our lives, but I thought I might as well post a tutorial on how. Especially since it has been forever since I have posted anything. 

I think my favorite thing about these flip flops is what my roomies little sister said about them. She said they were the type of flip flops that crafty, suburbian teenage girls made {said in a snooty "I'm way too cool for those" voice of course.}

Well, call me crazy, but I like em. 


{Another thing that inspired this project was Old Navy's $1 flip flop sale last weekend!}

Step One:


Gather together any fabric scraps you have lying around. I know I have bundles of them!

Step Two: 


Cut the fabric into relatively uniform pieces. You can try and match the fabric and make sure you have even numbers of each kind so the shoes will be the same, or you can just make it random. It looks cute either way!

Step Three: 


Acquire some flip flops to jazz up like the crafty teenager you are

Step Four: 


Tie the fabric onto the straps of the flip flops on one side like I did, or on both if you like that look better. {Ignore my un-manicured thumb. Yuck.}

Step Five: 


Enjoy wearing your cute new flip flops to the pool, beach, fair or any other summer activity you have planned! Or, make them for siblings and friends as a cute summer gift. 

Enjoy!

xoxo
C.R.M.